
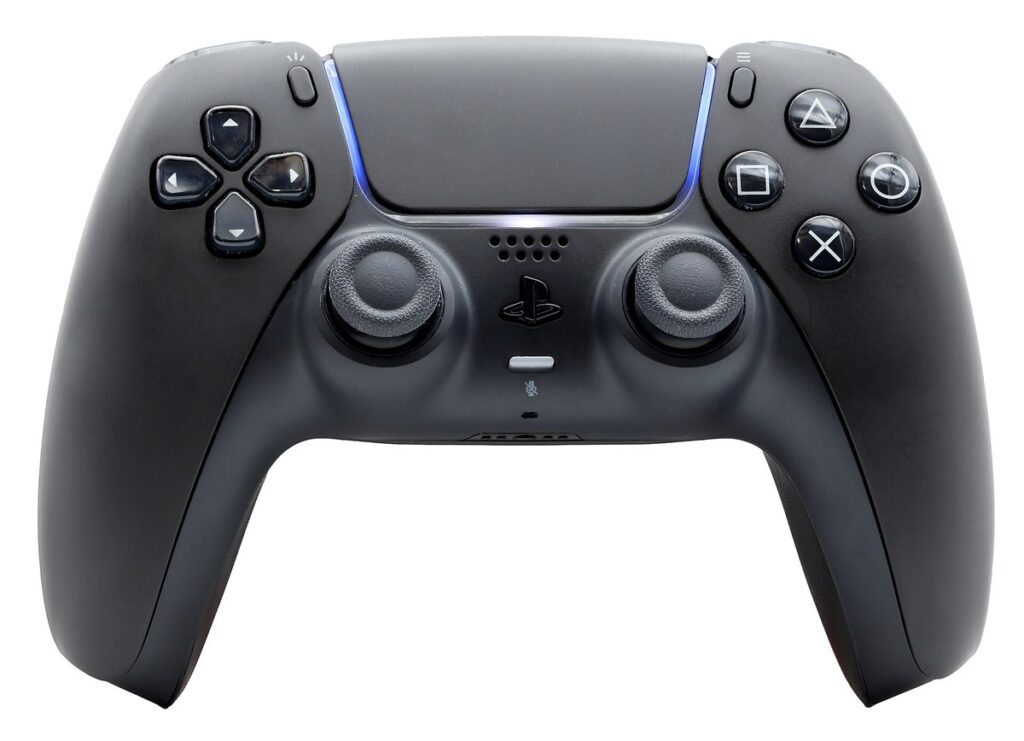
- PS5 controller drift comes from a worn potentiometer, the tiny sensor inside the stick that reads its position. It is a wear part, not a factory defect in most cases.
- Nintendo’s Joy-Con drift and DualSense drift share the exact same root cause. This is an industry-wide problem with analog stick technology, not a Sony-only issue.
- The real fix order is: recalibrate first, then clean with isopropyl alcohol, then replace the stick module or controller, then fall back on Sony’s official repair channel if the controller is still under warranty.
- A replacement stick module runs about $10 to $15 in parts (iFixit lists it at $14.99), but the repair itself requires soldering.
- DIY cleaning fixes mild drift caused by dust and grease. It does not fix a stick where the resistive track itself has physically worn through.
- The question isn’t “how do I stop drift forever.” It’s “which tier of fix matches how much drift I have and how long I need this controller to last.”
Your character walks left when you’re standing still. Your camera creeps up while you’re just trying to read a menu. That’s stick drift, and if you’re here, you’re probably already annoyed and looking for a real ps5 controller drift fix, not just another “turn it off and on again.” Good news: there is a real order of fixes, and each one buys you something different. The less good news is that no fix is a permanent forcefield against drift, because of what’s actually happening inside the stick. Once you understand that one part, the whole decision tree makes sense.
Why Your DualSense Sticks Drift in the First Place
Let’s start with the part nobody explains well. Your DualSense doesn’t have a “drift bug” hiding in its software. It has a physical part that wears out with use, the same way brake pads wear out on a car. Once you know what that part is, “stick drift” stops feeling random and starts feeling predictable, almost boring. That’s actually good news, because predictable problems have predictable fixes.
Sony’s own DualSense troubleshooting support page walks people through basic reset steps for controller issues, but it doesn’t spell out the mechanical cause in plain language. So let’s do that here, simply, the way you’d explain it to a friend.
How a Potentiometer Actually Tracks Your Thumb
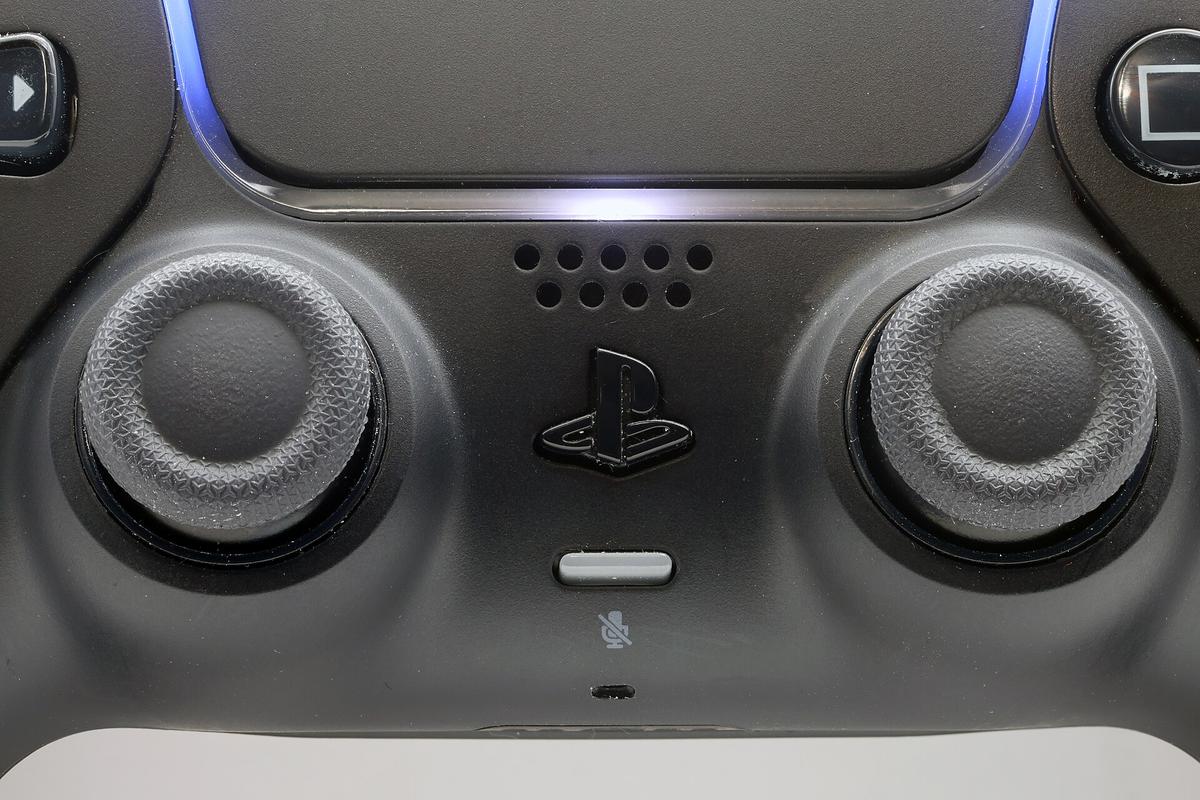
Inside each analog stick sits a small part called a potentiometer. Think of it like a tiny volume knob. As you push the stick, a small contact called a wiper slides across a curved strip of resistive material. Depending on where the wiper sits on that strip, it sends the console a different electrical signal. Your PS5 reads that signal and translates it into “stick is tilted this far, in this direction.”
That sliding contact is the whole problem. Every single time you push the stick, that wiper physically rubs against the resistive track. Do that thousands of times, which happens fast if you play anything competitive, and the track wears thin in the spots you use most. Dust and skin oil build up on top of that wear. Eventually the wiper reads a “phantom” position even when the stick is sitting dead center and nobody is touching it. Your console isn’t lying to you and your thumb isn’t shaking. The sensor itself is reporting bad data because the part underneath it is physically degraded.
Notice something about that description: the wear is not evenly spread across the whole track. Most players push their sticks toward the same handful of directions over and over, forward to sprint, a hard flick to turn a camera, a held diagonal to strafe. That means the wiper grinds the exact same few spots on the resistive strip far more than the rest of it. Drift almost always shows up as movement in one specific direction rather than a random wobble, because that’s the direction you actually wore the track down fastest. It’s less like a knob that gets loose all over and more like a footpath that erodes exactly where everyone steps.
The Same Wear Pattern That Made Nintendo’s Joy-Cons Famous for Drifting
Here’s the part that reframes the whole issue. Nintendo’s Joy-Con controllers became so notorious for drift that they triggered lawsuits and a wave of independent teardown investigations. When repair specialists opened up drifting Joy-Cons, they found the same story: a worn potentiometer wiper reporting false stick movement. Different company, different plastic shell, completely different game library, same tiny sliding contact wearing out the same way.
That’s the real “so what” here. This isn’t a Sony quality-control failure that a better factory could have avoided. It’s a limitation baked into potentiometer-based analog sticks as a category of hardware. Xbox controllers use similar wiper-based sticks and develop drift too, just with less public attention than Joy-Con or DualSense have gotten. Any controller built around this decades-old sensor design will eventually drift if you use it enough. The manufacturer, the price tag, and the release year don’t change the physics of a part sliding against another part.
That reframing matters for what you do next. If drift were a random defect, you’d be gambling every time you bought a replacement. Since it’s wear-based, you can actually reason about it: light use might take a year or two to show symptoms, heavy competitive play might show it in a few months, and the fix you pick should match how much life is left in the part versus how much life you need out of the controller.
How to Fix PS5 Controller Drift in the Right Order
There isn’t one single fix. There’s a ladder of fixes, and each rung costs more time or money than the last but also fixes a deeper level of wear. Skipping straight to the most drastic option wastes money if your drift is mild. Sticking with the cheapest option forever wastes your patience if your drift is severe. Here’s the order that actually makes sense, cheapest and fastest first.
Think of it less like a single decision and more like a triage process at a repair shop. A tech doesn’t reach for a soldering iron the moment a customer mentions drift, and they don’t just hand back a “reset it and see” answer for a controller that’s visibly falling apart either. They start cheap, watch what happens, and only escalate once the cheaper option proves it isn’t enough. That’s exactly the mindset worth borrowing here, because it stops you from either wasting a Saturday soldering a part you didn’t need to replace, or wasting months limping along on a five-minute fix that was never going to hold.
Reset and Recalibrate Your Controller Before Anything Else
Before you touch a screwdriver, rule out the free fixes. First, hold down the small recessed reset button on the back of the controller, near the left shoulder button, for about five seconds using a paperclip or SIM tool. This restores the controller’s default hardware settings and clears out minor glitches that can mimic drift.
Next, check your PS5’s own controller menu. Go to Settings, then Accessories, then Controllers (General), where Sony exposes options like trigger effect intensity and vibration intensity. It’s worth being honest here: the PS5 system menu does not currently offer a dedicated built-in stick recalibration tool the way some competing platforms do. What Sony does provide is that hardware reset button, plus firmware updates for the controller itself, which occasionally include sensor-handling improvements.
If you want a deeper calibration pass, the gaming community has built free browser-based tools that talk to the DualSense over USB and rewrite its internal calibration data, effectively telling the chip where “center” really is. These tools can meaningfully reduce mild drift caused by calibration drift rather than physical wear. They will not fix a stick whose resistive track has actually worn through, because there’s no calibration setting that can undo a missing strip of material.
Clean the Stick’s Potentiometer With Isopropyl Alcohol
If recalibration doesn’t hold, the next rung is cleaning, and this is the fix independent repair guides consistently point to for drift caused by dust, oil, or light grime sitting on the contact. This tier does mean opening the controller’s case, but it stops well short of the soldering iron: no desoldering, no circuit-board rework, just careful prying with plastic tools and a steady hand.
iFixit’s own DualSense stick drift cleaning guide walks through the real process: power the controller off, pop the rear case, disconnect the battery and a couple of ribbon cables, then gently pry open the small potentiometer housing under the drifting stick to reach the metal “wiper” contact directly. Lift the wiper out with tweezers, wipe it and the inside of the housing with a cotton swab dipped in 90 percent or higher isopropyl alcohol, then seat the wiper back exactly the way it came out and snap the housing shut. Let everything air-dry for a few minutes before you close the case and power the controller back on. Work over a clean, well-lit surface, keep the ribbon cables loose, and go slow, since they tear more easily than they look.
iFixit is direct about the limits of this method: the guide itself says it “only applies to controllers with gunk or grease that causes stick drift,” not a track that’s mechanically worn through. In practice, that means cleaning fixes a real chunk of mild-to-moderate drift cases, especially in controllers that see a lot of dust or are used with sweaty hands, but it is not a permanent cure for a controller with months of heavy competitive play behind it.
Replace the Analog Stick Module or Swap in a Wear-Free One
When cleaning doesn’t hold either, the drift is almost certainly mechanical: the resistive track itself has worn down, not just gotten dirty. At that point the only fix that actually resets the clock is replacing the part.
The standard replacement path swaps in a new potentiometer-based stick module, the same design as the original, following iFixit’s DualSense joystick replacement guide. iFixit lists this exact replacement joystick assembly for the DualSense at $14.99, which lines up with the realistic $10 to $15 parts-cost range you’ll see across reputable repair sources. The catch is that installing it requires desoldering the old module from the controller’s circuit board and soldering in the new one, which is an intermediate-to-advanced skill, not a beginner weekend project. If you’ve never soldered small surface-mount connections before, this is a real place to either practice on a cheap donor controller first or hand the job to a repair shop.
There’s also a second path worth knowing about, because it actually changes the “so what” of this whole article: aftermarket contactless replacement sticks, built around magnetic sensing technology instead of a sliding wiper, are available for the DualSense. These modules read the stick’s position using a magnet and a sensor with no physical contact at all, which means there’s no wiper wearing down a track over time. That’s the closest thing to a permanent fix for drift as a category of problem, not just this specific instance of it, though it still requires the same soldering skill to install.
Go Through Sony’s Official Repair and Warranty Process
If your controller is still within its warranty window, or you’d rather not touch a soldering iron at all, Sony’s own support channel is the safer route, even though it moves slower than a DIY fix. Start at Sony’s official DualSense troubleshooting page, run through the reset and software-update steps it walks you through, and if the controller still shows drift, it will route you toward PlayStation’s official repair request process.
Here’s where you need to keep your expectations realistic. Sony’s published PS5 warranty terms cover the console hardware itself, and that same page is explicit that this coverage is separate from “any peripheral, controller, accessory or cable,” which get their own, narrower terms. Widely reported figures put standalone DualSense controller coverage at around one year from purchase against defects in materials and workmanship, not damage from normal wear, which again is exactly the gray area stick drift sits in. Whether a support agent classifies your drift as a covered defect or as ordinary wear can depend on how quickly it showed up and how the case gets logged, so it’s worth being specific and polite when you describe the symptom.
Inside that window, a defect-classified repair is typically handled at little or no cost to you beyond getting the controller to Sony. Outside that window, Sony’s official consumer channel does not publicly advertise a fixed, flat-rate out-of-warranty price for repairing a single drifting controller, and real-world reports from users are mixed on whether an out-of-warranty single-controller repair is even offered through official channels in every region. Because that specific pricing and availability can shift by country and by season, don’t take a number you find on a random blog as gospel. Check Sony’s own repair portal for your region before you decide, and treat any repair-cost figure that isn’t sourced straight from Sony as a rough estimate at best.
DIY Cleaning vs Professional Repair: Matching the Fix to the Damage
Once you understand that drift is wear, not fate, the decision between doing it yourself and paying someone else stops being about which one is “better” in the abstract. It becomes about matching the fix to how far along the wear already is and how long you actually need the controller to survive.
When a Five-Minute Fix Is Genuinely Enough
If your drift only shows up occasionally, like a slight camera creep in one direction that comes and goes, you’re probably looking at light wear or just dust and oil sitting on the contact. Recalibration and an alcohol cleaning pass are proportionate here. They’re free or nearly free, they take under fifteen minutes combined, and for genuinely mild cases they hold up for months. There’s no reason to crack open the shell and start desoldering a part that might not even be the actual problem yet.
When You’re Just Postponing a Bigger Repair
If the drift comes back within days of a cleaning, or if it was severe from the start, meaning your character wanders noticeably even when you’re not touching the stick, you’re dealing with a resistive track that’s actually worn through. At that stage, repeating the alcohol cleaning every week or two isn’t a fix, it’s a stopgap that burns your time without solving anything underneath. That’s the signal to move to module replacement, whether you do it yourself with a soldering iron and a $15 part, or hand it to a repair shop and pay for their labor on top of the parts cost.
How Long a Cleaned or Repaired Controller Should Actually Last
This is where the DIY-versus-official tradeoff gets concrete. A DIY cleaning is cheap and fast, but it carries some risk: tug a ribbon cable wrong while the case is open and you can tear it, or apply too much alcohol and it can wick into places it shouldn’t. A DIY module swap is cheap in parts but risky in skill, a failed solder joint can turn a $15 repair into a dead controller. Official Sony repair, when it’s available and in-warranty, is the safest option for reliability and doesn’t touch your warranty status, but it’s slower and, once you’re outside that warranty window, its availability and pricing get murkier.
So which tier is “right” for you? If you’ve got one PS5 controller and you use it casually, a recalibration and a cleaning pass will probably outlast your patience for the game you’re currently playing. If you’re competitive, if this is your only controller, or if the drift keeps coming back, the module swap or an official repair is the fix that actually resets the clock instead of just buying you another few weeks.
If you want more hands-on hardware breakdowns like this one, browse our full games coverage for more device deep-dives.
Frequently Asked Questions
Is PS5 Controller Drift Covered Under Warranty?
It can be, if the controller is still inside Sony’s standard limited warranty period and the drift is judged to be a manufacturing defect rather than wear from normal use. Because stick drift sits right at that line between “defect” and “normal wear,” coverage can vary by region and by how the support agent classifies your specific case, so it’s worth starting a support request through Sony’s official channel rather than assuming either way.
Does Cleaning the Stick Actually Fix Drift for Good?
Not always. Cleaning with isopropyl alcohol reliably fixes drift caused by dust, oil, or light grime sitting on the potentiometer’s contact, and repair guides are explicit that this is exactly the case it’s built for. If the resistive track underneath has already worn through from months of use, cleaning can improve things temporarily but the drift typically returns, because you cleaned the surface without replacing the worn part.
How Much Does It Cost to Fix PS5 Controller Drift Myself?
A replacement stick module itself runs roughly $10 to $15, with iFixit pricing its DualSense joystick assembly at $14.99. That number only covers the part. You’ll also need basic soldering tools if you don’t already own them, and the repair requires desoldering the old module and soldering in the new one, which is an intermediate skill rather than a beginner one.
Can I Prevent Stick Drift From Happening in the First Place?
You can slow it down, but you can’t fully prevent it, because the wear comes from the stick’s basic sliding-contact design, not from anything you’re doing wrong. Keeping the controller clean and dust-free, avoiding excessively hard or repetitive stick inputs where you can, and not leaving it somewhere hot or dusty will all extend the part’s life. Eventually, with enough hours of play, the wiper will wear the track regardless.
Is DualSense Drift the Same Problem as Nintendo Joy-Con Drift?
Yes, mechanically it’s the same root cause. Both controllers rely on potentiometer-based analog sticks, where a small wiper slides across a resistive strip to report stick position. Independent teardowns of drifting Joy-Cons found the same worn-wiper pattern that shows up in drifting DualSense controllers, which is why this shows up across brands rather than being unique to one company’s manufacturing.
Should I Just Buy a New Controller Instead of Fixing the Old One?
It depends on how far the wear has progressed and how much your time is worth. If recalibration and cleaning haven’t held, and you don’t want to solder a replacement module yourself, buying a new controller can be faster than sourcing parts and tools for a one-off repair. But if you go through several controllers over a few years, the same wear pattern will eventually show up in the replacement too, since the underlying stick technology hasn’t changed, so factoring a $15 repair or a wear-free aftermarket module into your plan can be cheaper long-term than repeatedly replacing the whole controller.
Do All PS5 Controllers Eventually Get Stick Drift?
Given enough use, most will show at least mild symptoms eventually, because the wear comes from the stick’s fundamental sliding-contact design rather than from a specific bad manufacturing batch. How fast it shows up varies a lot based on how many hours you put in and how demanding your stick inputs are, which is why some players never notice it and others see it within months.
About the Author
Elena Brooks
Elena Brooks is the person her group chat texts when something at home stops working or a health trend starts trending. She’s spent years turning that instinct into a job — digging into the research behind everyday questions, calling the experts, and writing up what holds up and what doesn’t. Her beat is wherever curiosity points: kitchens, cars, pets, sleep, money, and the occasional meteor shower.