
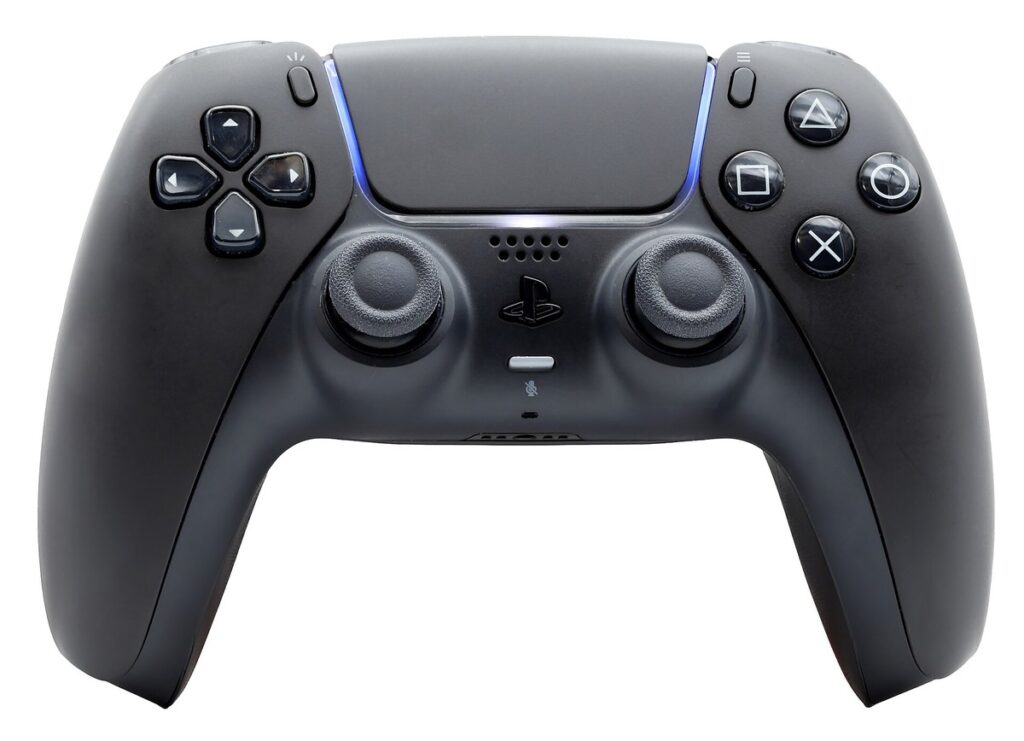
- Drift is almost always a worn part inside the stick, not a software bug. Still, try two free steps first: a firmware update and an in-game reset.
- A replacement stick part costs a small fraction of a new controller. Swapping it takes about an evening with basic tools.
- Sony’s repair service and most repair shops cost more than parts alone, but you need zero tech skill. You just mail it in and wait.
- DualSense drift isn’t only a Sony problem. Nintendo’s Joy-Con controllers wear out the same way, which is why newer high-end controllers now use a different kind of sensor.
- A brand-new controller fixes the problem instantly and comes with a full warranty. It’s also the most expensive fix for a problem a cheap part usually solves just as well.
You let go of the left stick to talk to a friend. Your character keeps walking anyway. You center the camera and let go. It keeps turning on its own. That’s PS5 controller drift, and it’s one of the most common DualSense complaints out there. Here’s the good news. Drift isn’t bad luck. It’s a small part wearing out, and it wears out on a fairly predictable schedule. Once you know what stage you’re in, you’ll know exactly what this fix should cost you. Sometimes the answer is nothing at all.
Why Your DualSense Stick Actually Drifts
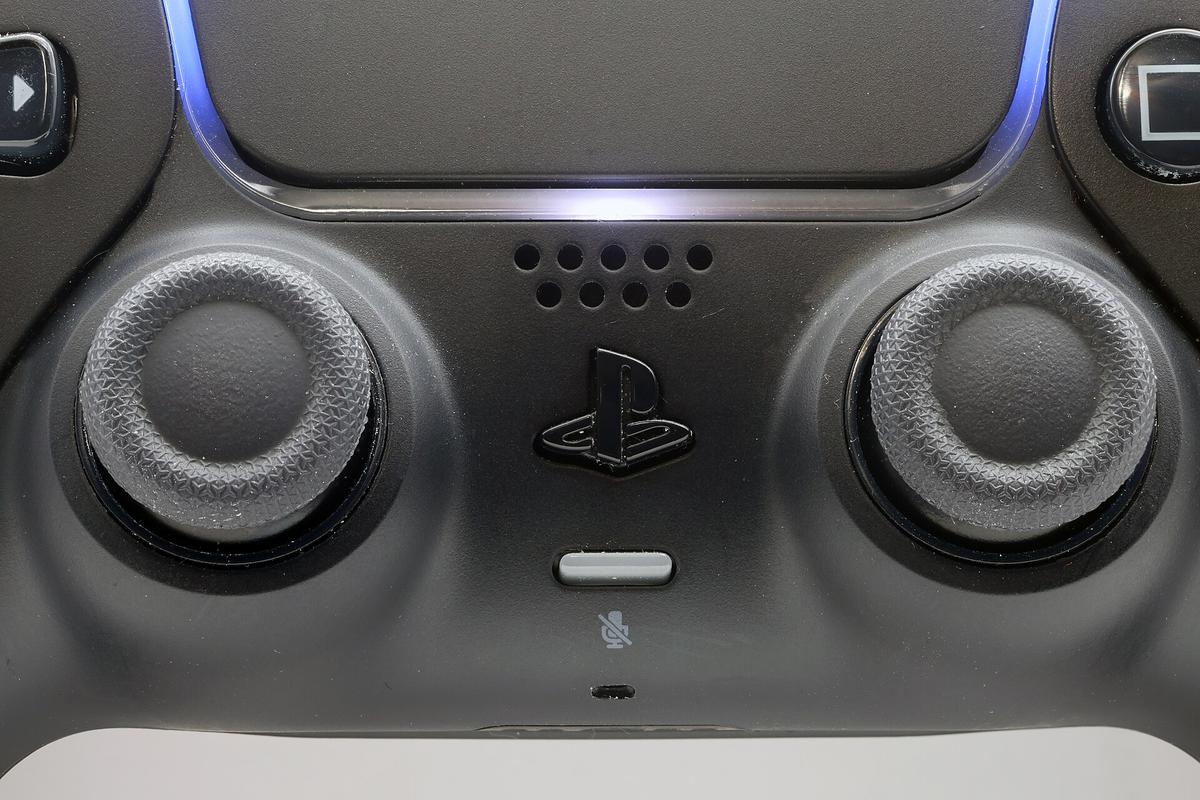
Every DualSense stick uses a small part called a potentiometer to sense direction. Think of it as a tiny dial with a metal arm, called a wiper, that sweeps across a curved track. When you tilt the stick, the wiper slides along that track. The controller reads exactly where the wiper sits and turns that into a direction. It’s a simple system. It’s also a system with two parts rubbing against each other. And parts that rub wear out.
You push the stick hardest in just a few directions, over and over, thousands of times a session. That wears one part of the track faster than the rest. At first you’ll barely notice it. Maybe the stick drifts a little when you let go. Maybe one side just feels slightly looser than the other. Left alone, that same spot keeps wearing down. The drift gets worse. It never gets better on its own. That’s why drift almost never shows up on a brand-new controller. It shows up on the stick you use hardest, usually the left one, since it handles far more total movement than the camera stick.
Before you assume the worst, rule out two common false alarms. First, check if it’s the game, not the controller. A bad setting, a tight dead zone, or a mapping bug in one title can look exactly like drift, then vanish in every other game. Second, confirm the drift is even real. A free tool like hardwaretester.com shows your stick’s position live in your browser. Plug the controller in, take your hands off the sticks, and watch the screen. If the dot drifts away from center with no touch at all, that’s real hardware drift.
This isn’t just a Sony problem, either. Nintendo saw the same issue with its Joy-Con controllers, and the wear pattern is nearly identical. DualSense drift became a big enough complaint that a French consumer group, UFC-Que Choisir, filed a legal complaint against Sony in 2023. It claimed Sony knew about the failure rate and didn’t do enough. Sony has never shared an exact failure rate, and that case doesn’t change your fix today. But it tells you something useful: you’re not imagining a “cursed” unit. You’re running into a real limit of an old sensor design used across the whole industry.
What’s Actually Wearing Out Inside the Stick
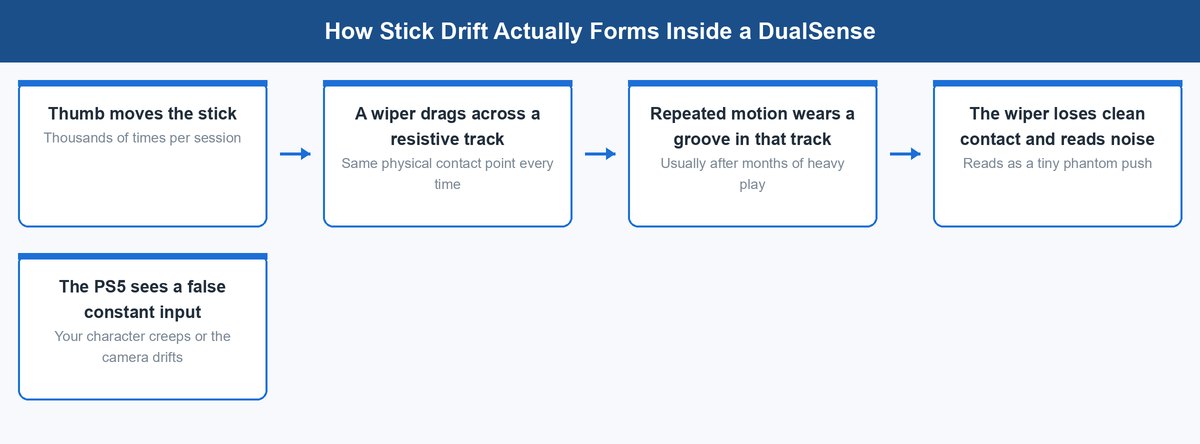
It helps to know exactly what’s failing, because it tells you which fixes will actually work and which ones only buy you time. This is the same process playing out right now inside millions of drifting controllers, whether yours just started or has been getting worse for months.
Once the wiper has cut a real groove into the track, cleaning can restore a cleaner connection for a while. That’s why a good clean sometimes “fixes” drift for a few weeks. But cleaning can’t undo a groove that’s already there. That’s the ceiling on cleaning as a fix. It’s also why the steps below move from free and temporary toward more permanent as you go.
Why a Firmware Update Can Genuinely Help
This sounds strange for a hardware problem, and most of the time it’s a smaller factor than the actual wear. But Sony has shipped firmware updates before that changed how the console filters small stick movements. A firmware update can’t repair a badly worn track. On a stick that’s just starting to drift, though, better filtering can be the difference between unplayable and fine for now.
Why Resetting the Stick Isn’t the Same as Repairing It
Resetting, or recalibrating, tells the game where “center” and “full tilt” sit right now. It resets the map, not the ground underneath it. On a lightly worn stick, this can genuinely fix things. On a badly worn stick, resetting just shifts the dead zone onto the same worn spot. The drift usually comes back within days.
Free Fixes to Try Before Spending Anything
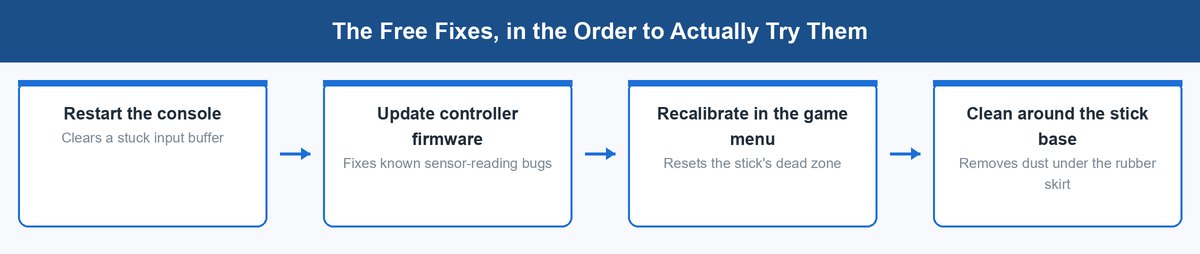
Try these steps in order. Each one takes just a few minutes. None of them can make things worse. Together, they clear up a real share of drift complaints, with no tools and no disassembly.
1 Restart and Update Firmware First
Turn the PS5 fully off, not rest mode, and unplug it for about 30 seconds. Plug the controller back in with a USB cable. Go to Settings, then System, then System Software, and check for a controller update. The PS5 usually checks automatically when a wired controller connects, but it’s worth confirming by hand if the controller has sat unused for a while.
2 Reset the Stick In a Game or On a Computer
Many games hide a stick-reset option inside their settings menu. Check there first. If you have a PC or Mac nearby, plug the DualSense in over USB and use Sony’s own calibration tool, or a trusted third-party app. That usually gives a more thorough reset than any single game offers.
3 Clean Around the Base Without Opening the Shell
Turn the controller off. Hold a can of compressed air at an angle near the base of the stick, not straight down into it, and blow out any dust caught under the rubber skirt. Follow with a dry microfiber wipe. A cotton swab dipped in strong (90%+) isopropyl alcohol, used right where the stick shaft meets the housing, can clear grime that a dry wipe misses. Never use water. Never spray liquid straight into any opening.
How to Repair the Stick Yourself Once Cleaning Stops Working
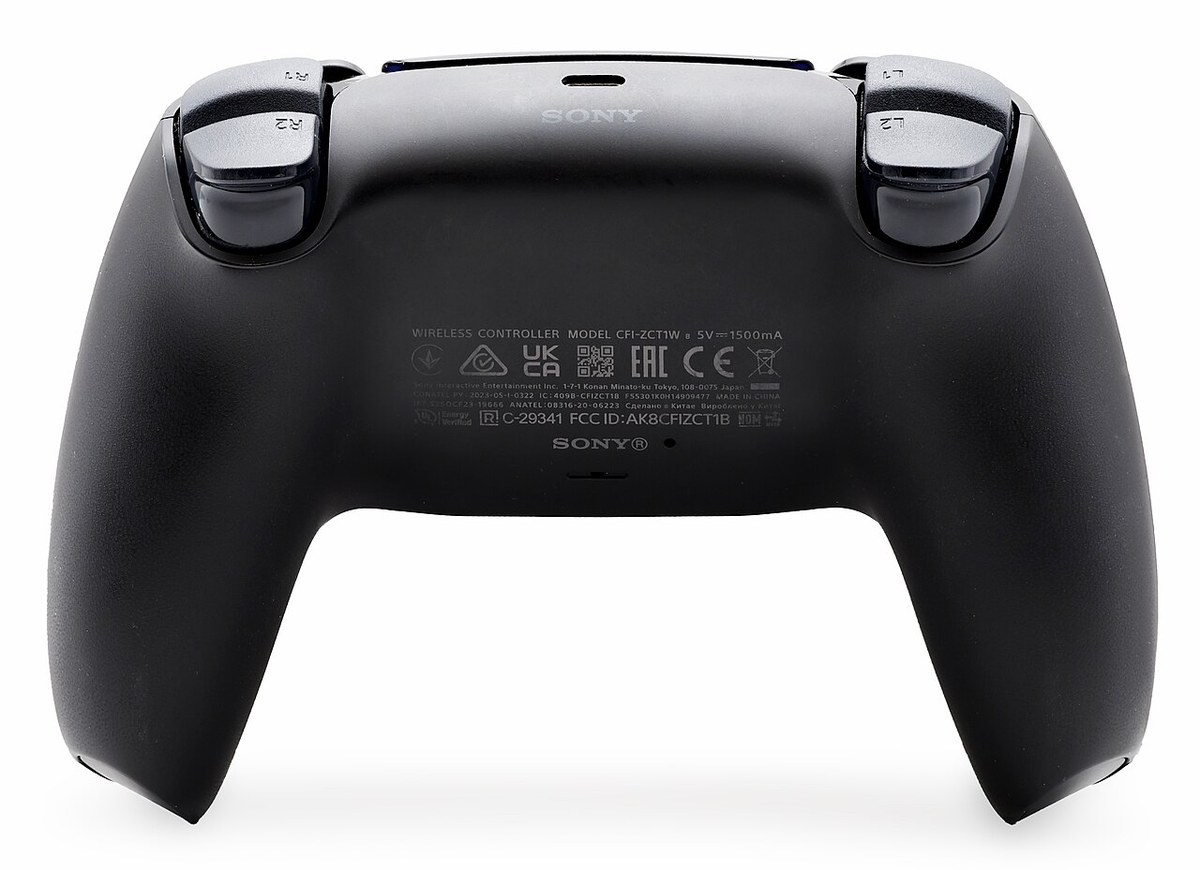
If the free fixes only help for a little while, or don’t help at all, the wiper has almost certainly cut a groove into the track. The real fix is replacing that worn part. This is a well-documented repair. Sites like iFixit walk through the exact screws and cables involved. It’s genuinely doable if you’re comfortable with a small screwdriver and a little patience.
What the Repair Actually Involves
You’re swapping the whole joystick module. That’s the sensor, its housing, and the stick shaft, all as one piece. Not just a rubber cap or a spring. The job means opening the back shell, disconnecting the battery, removing the old module, and connecting the new one before putting everything back together. Most guides put a first attempt at 30 to 60 minutes. Someone who’s done it before can often finish in 15.
What It Costs and How Long It Takes
Replacement stick modules for the DualSense usually run $10 to $20, depending on the seller and whether you buy one or a pair. The tools are cheap too: a small screwdriver, a plastic prying tool, and sometimes a soldering iron for certain parts. There’s no shipping wait, so a DIY swap can go from broken to fixed in one evening. That’s faster than every option below except buying new.
The Mistakes That Turn an Easy Job Into a Broken Controller
Weighing DIY, Third-Party, Sony, and a New Controller
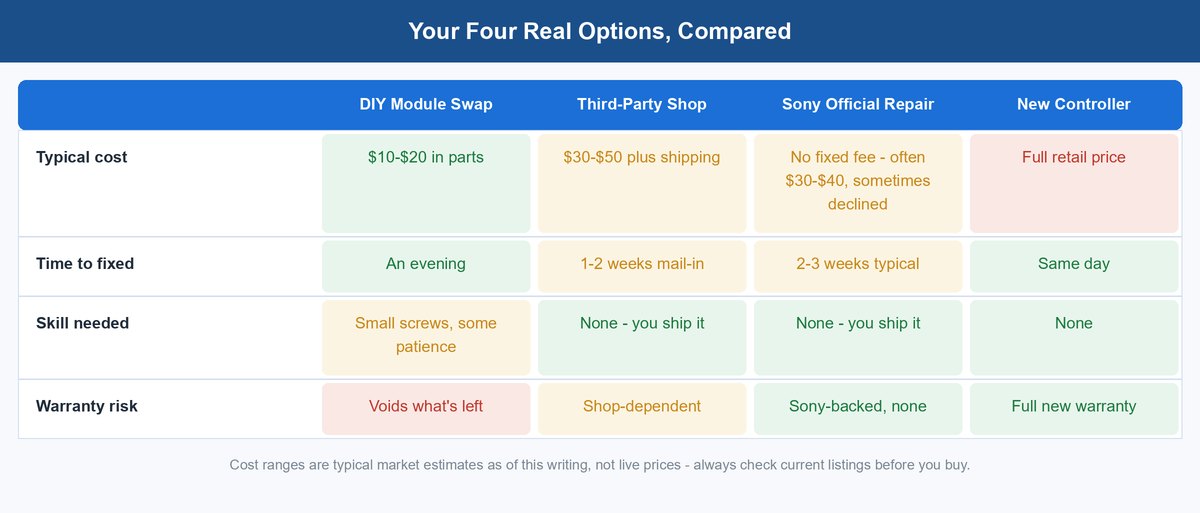
Once you’ve tried the free fixes, you’re really choosing between four paths. They trade off cost, time, effort, and risk in different ways. None of them is the wrong answer. The right one just depends on what you have more of: a free evening, a spare controller to use while you wait, or a strong wish to avoid touching the hardware at all.
Doing It Yourself With a Replacement Part
Best if you’re comfortable with small electronics and want the controller fixed the same day. The catch: a mistake, like a torn cable or a stripped screw, can turn a cheap fix into a dead controller. That’s a real risk, not just a scare tactic, which is why the mistakes section above is worth a second read before you start.
Sending It to a Repair Shop
This sits in the middle. You skip the technical work, but you also skip Sony’s own process. Turnaround is usually one to two weeks including shipping both ways. Prices tend to land above DIY parts but often below Sony’s out-of-warranty rate. Check a shop’s reputation before you send anything. Look for one that’s clear about its repair process and its parts, not vague about what’s actually going inside your controller.
Using Sony’s Official Repair Service
If your controller is still under warranty, this option is close to free, and it carries zero risk for you. Out of warranty, Sony doesn’t publish a fixed DualSense repair fee the way it does for consoles, and the experience is inconsistent: some owners get quoted somewhere in the $30-$40 range, others are told the controller is simply too old to service and are pointed toward buying new instead. Turnaround, when Sony does take the job, has often landed around two to three weeks, depending on your region and how busy the service is. When it’s offered, you get a repair backed by Sony, and often a short warranty on the repair itself. That’s worth it if you’d rather not risk a working controller on your own hands, but don’t count on a guaranteed price until you actually submit the request.
Just Buying a New Controller
The fastest fix by far. Same day if a nearby store has stock, or a couple of days if you order one. It’s also the most expensive choice here by a wide margin, since you’re paying for a whole controller to fix one worn part. It makes the most sense if your current controller has other problems piling up too, like fading battery life or sticky buttons, where a stick swap would only be the first of several repairs.
How to Make the Next Stick Drift Slower
You can’t stop a wear part from wearing out. You can slow the clock, though. Try not to slam the stick to its hard edge when a gentler push gets the same result in-game; most games register a full move well before the stick physically maxes out. Keep the controller away from dust and sand where you can, and give it a light compressed-air clean now and then, before dust works its way past the rubber skirt. If you’re due for a new controller anyway and drift is a dealbreaker, look at Sony’s higher-end DualSense Edge, which at least makes the stick modules easy to swap yourself, or a third-party pad — several of those now use Hall-effect or TMR sticks, which sense position with a magnet instead of a metal wiper. There’s nothing left to physically wear a groove into on those. That’s the industry’s real long-term fix for this exact problem.
Frequently Asked Questions
How do I know it’s really stick drift and not a game setting?
Test it with a free gamepad tester like hardwaretester.com/gamepad, with your hands fully off the sticks. If the on-screen dot moves away from center on its own, that’s real drift happening at the hardware level. It isn’t a setting hiding inside one game.
Can I fix PS5 controller drift without opening the controller?
Often, yes. Restarting the console, updating the controller’s firmware, resetting the stick in a game or on a computer, and cleaning around the base with air and a little alcohol all work with zero disassembly. They help most on drift that just started. A stick that’s been drifting for months usually needs the part inside replaced.
Does Sony still cover controller drift under warranty?
Standard DualSense controllers usually carry a limited warranty, and drift from normal wear can qualify for a free repair or swap inside that window. Just contact Sony support directly to check. Warranty length and terms vary by region, so confirm your own coverage rather than assuming either way.
How long does a replacement stick part actually last?
A new part resets the wear clock to zero. In normal use, it should last roughly as long as the original did before it started drifting, often many months to a couple of years depending on how hard and how often you play. It’s still the same kind of part, though, so it will wear out again eventually. That’s the tradeoff of any repair that doesn’t change the underlying sensor design.
Is DualSense drift worse than Xbox or Nintendo Switch controllers?
Not really. Xbox controllers and the Nintendo Switch’s Joy-Cons use the same basic wiper-and-track design, and both have seen big waves of drift complaints, Joy-Con drift especially. Drift comes from this whole style of sensor, not from one company’s mistake.
Will resetting my controller erase my other settings?
No. A stick reset only changes what the controller thinks “center” and “full tilt” are. It doesn’t touch button remapping, vibration strength, trigger effects, or anything about paired devices.
Should I just buy a DualSense Edge or a Hall-effect controller instead?
If drift keeps hitting controller after controller, a stick built with Hall-effect or TMR sensing is a real long-term fix, since there’s no metal wiper left to wear a groove. It costs more upfront than a standard controller. It’s worth that extra cost mainly if you play enough that stick wear has become a repeat headache instead of a once-in-a-while annoyance.
About the Author
Elena Brooks
Elena Brooks is the person her group chat texts when something at home stops working or a health trend starts trending. She’s spent years turning that instinct into a job — digging into the research behind everyday questions, calling the experts, and writing up what holds up and what doesn’t. Her beat is wherever curiosity points: kitchens, cars, pets, sleep, money, and the occasional meteor shower.